Achieving a 100% success rate in houseplant propagation from cuttings might sound like a lofty goal, but with the right techniques, it's more attainable than you think.
Imagine having a thriving collection of plants all grown from cuttings you took yourself. The satisfaction of watching those roots develop and new growth emerge is truly rewarding.
So, how can you ensure your cuttings root successfully every time? Let's uncover the secrets behind this seemingly magical process and set you on the path to becoming a propagation pro.
Choosing the Right Cutting
When selecting a cutting for propagation, consider choosing a healthy stem with at least two nodes. The nodes are where new roots will form, so having multiple nodes increases the chances of successful propagation. Look for a stem that's free from any signs of disease or damage. Healthy leaves and a strong, vibrant color indicate a cutting that's more likely to thrive.
To ensure the best chances of success, opt for a cutting that's taken from a plant during its growing season. This is typically in the spring or summer when plants are actively growing. Choosing a cutting during this time means that the plant is in its prime for producing new roots and growing into a healthy new plant.
Additionally, consider the size of the cutting you choose. While larger cuttings may seem like they'd grow faster, smaller cuttings often establish roots more quickly. They also require less energy to maintain, allowing the plant to focus on root growth. Selecting the right cutting is a crucial first step in successful houseplant propagation.
Preparing the Cutting
To begin preparing the cutting for propagation, carefully trim off any excess leaves from the lower portion of the stem. This step is crucial as it helps the cutting focus its energy on root development rather than sustaining unnecessary foliage. Ensure that the cutting is around 4-6 inches long, with at least a couple of leaves left at the top. Use a sharp, clean pair of gardening shears to make a clean cut right below a node, which is where new roots will emerge. Remove any flowers or buds present on the cutting, as they can divert energy away from root growth.
After trimming, it's essential to allow the cutting to callus over before planting it. Place the cutting in a warm, dry location for a few days to allow the cut end to dry and form a callus. This callus helps prevent rotting when the cutting is planted in soil. Once the cutting has callused, it will be ready for the next step in the propagation process.
Rooting Hormone Application
Consider applying rooting hormone to enhance the success rate of your houseplant cuttings propagation. Rooting hormone is a beneficial substance that can help stimulate root development in your cuttings. It comes in various forms such as powders, gels, and liquids, and you can find them at your local garden center. When preparing your cuttings for propagation, dip the cut end into the rooting hormone before planting it in the soil. This helps encourage the growth of new roots, increasing the chances of successful propagation.
Rooting hormone contains auxins, a group of plant hormones that promote root formation. By using rooting hormone, you're providing your cuttings with a boost to establish themselves in their new environment. It's a simple and effective way to improve the rooting process and ensure the health and vitality of your new plants. Remember to follow the instructions on the rooting hormone product for the best results. With the help of rooting hormone, you can increase the likelihood of successful houseplant propagation from cuttings.

Proper Watering and Light Conditions
Enhancing the success of your houseplant propagation from cuttings involves ensuring proper watering and light conditions. Water your cuttings consistently but avoid overwatering, as this can lead to root rot. Before watering, check the moisture level of the soil by inserting your finger about an inch deep – if it feels dry, it's time to water. Use room temperature water to avoid shocking the plants.
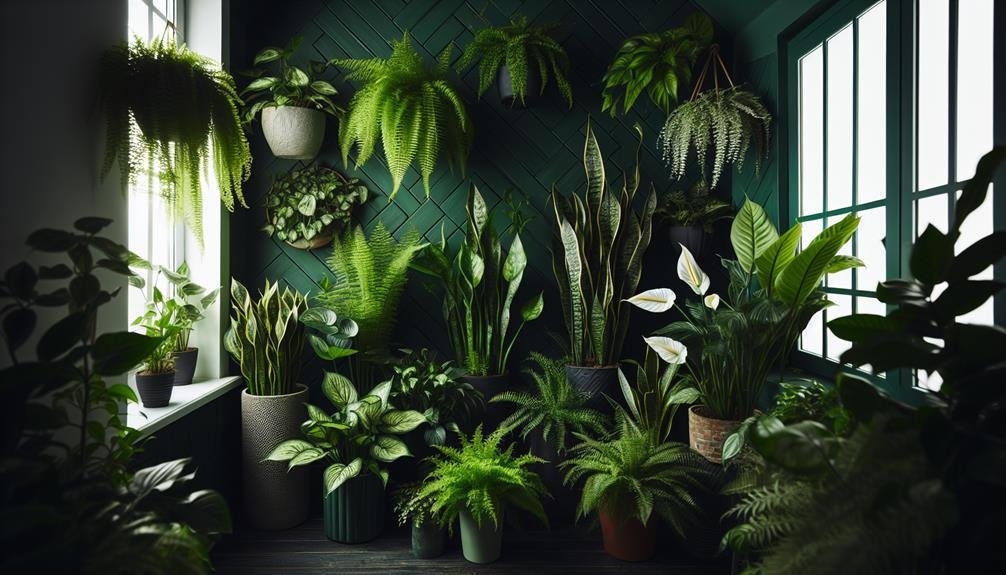
Light is crucial for the growth of your cuttings. Place them in a bright location, but avoid direct sunlight as it can scorch the delicate new roots. Indirect light or filtered sunlight works best for most plant varieties. Rotate your cuttings occasionally to ensure all sides receive equal light exposure, promoting even growth. If you notice your plants leaning towards the light source, it's a sign they need to be turned.
Monitoring Growth and Repotting
Keep a close eye on the growth of your propagated cuttings and be prepared to repot them as needed for continued healthy development. As your cuttings start to establish roots and grow, it's essential to monitor their progress regularly. Look out for signs such as roots peeking out from the drainage holes or the plant becoming root-bound in its current container. These are indications that it's time to repot your cuttings into larger containers to provide ample space for further growth.
When repotting, choose a container that's slightly larger than the current one to accommodate the growing root system. Ensure the new pot has drainage holes to prevent waterlogging, which can lead to root rot. Use a well-draining potting mix to promote healthy root development and overall growth. Gently loosen the roots when transferring the cuttings to their new container to encourage them to spread out into the fresh soil.
Frequently Asked Questions
Can I Propagate a Houseplant From a Cutting Taken From a Plant That Is Not Thriving or Healthy?
Absolutely, you can propagate a houseplant from a cutting taken from a plant not thriving. Even if the parent plant isn't doing well, the cutting still has the potential to grow into a healthy plant.
How Long Does It Typically Take for a Cutting to Develop Roots and Start Growing Into a New Plant?
Typically, it takes a few weeks for a cutting to develop roots and start growing into a new plant. During this time, it's important to provide the cutting with proper care and conditions to encourage root growth.
Keep the soil moist but not waterlogged, provide adequate light, and be patient as the new roots begin to form.
With consistent care, you'll soon see your cutting flourish into a healthy, thriving plant.
Are There Any Specific Tools or Equipment That Are Essential for Successful Houseplant Propagation From Cuttings?
To successfully propagate houseplants from cuttings, essential tools include:
- Sharp scissors or pruners
- A rooting hormone (optional but helpful)
- A clean container with drainage holes
- Well-draining soil or a rooting medium
- A spray bottle for misting
These tools will help you create optimal conditions for root development and growth. Remember to keep your tools clean and your cuttings healthy to increase your chances of successful propagation.
Can I Propagate a Houseplant From a Cutting That Has Already Started to Develop Roots in Water?
Yes, you can propagate a houseplant from a cutting that has already started to develop roots in water. It's a great sign of progress! Simply transfer the cutting into soil once the roots are a couple of inches long.
This transition helps the plant adjust to its new environment and encourages further growth. Remember to keep the soil moist and provide adequate light to support the cutting's development.
Are There Any Specific Fertilizers or Nutrients That Should Be Used During the Propagation Process to Promote Healthy Growth?
To promote healthy growth during propagation, it's crucial to use specific fertilizers or nutrients. Adding a balanced liquid fertilizer diluted to half strength can provide essential nutrients for the developing roots and new growth.
Look for a fertilizer with a higher phosphorus content to encourage root development. Remember to follow the instructions on the fertilizer label and avoid over-fertilizing, as it can harm the delicate cutting.
Conclusion
You've followed all the steps and now your houseplant cuttings have successfully propagated!
With the right cutting, rooting hormone, watering, and lighting, your plants are thriving.
Keep monitoring their growth and be ready to repot them when they outgrow their containers.
Enjoy watching your new plants flourish in your home!