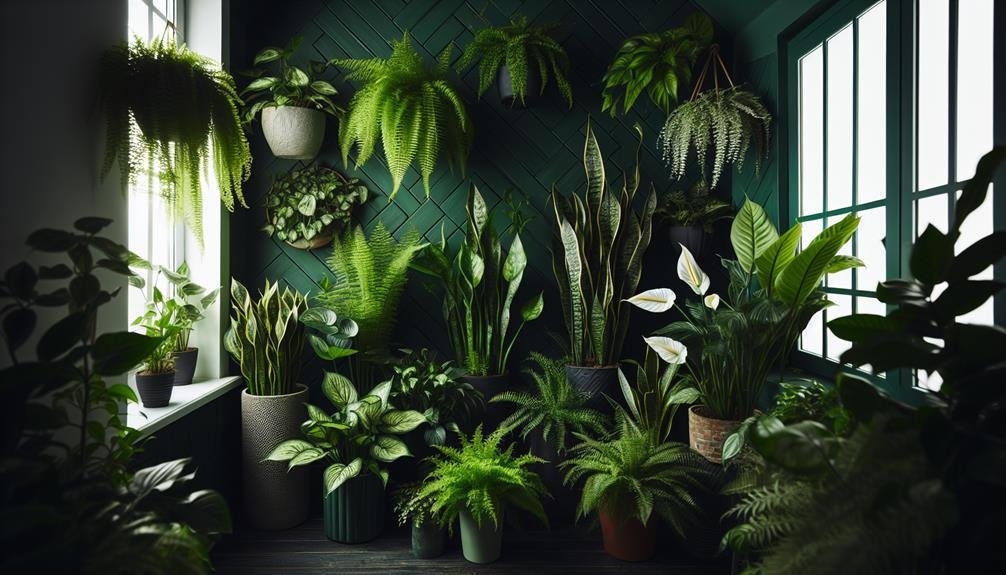
Did you know that propagating houseplants from cuttings is a cost-effective way to expand your indoor garden? With just a snip here and a little care there, you can create new plants from your existing ones.
But where do you start? How do you ensure success with this propagation method? Follow these ten straightforward steps to unlock the secrets of growing new plants from cuttings.
Before you know it, you'll be surrounded by flourishing greenery, all born from a single snip of a leaf or stem.
Selecting a Healthy Plant
When selecting a healthy plant for propagating houseplants from cuttings, look for vibrant green leaves and sturdy stems. Healthy leaves indicate a plant's ability to photosynthesize effectively and provide the necessary nutrients for root development. Avoid plants with yellowing or wilting leaves, as they may struggle to support new growth. Sturdy stems are essential for providing structural support to the new cutting as it develops roots. Look for stems that are firm and free from any signs of damage or disease.
Additionally, check the plant for any pests or diseases before taking cuttings. Infestations or infections can easily spread to the new cuttings, hindering their growth and development. Inspect both the upper and lower surfaces of the leaves, as well as the stems, for any signs of unwanted guests.
Choosing the Right Cutting Tool
To ensure successful propagation, selecting the appropriate cutting tool is crucial for cleanly and effectively taking cuttings from your chosen plant. When choosing a cutting tool, opt for sharp, sterilized scissors or pruning shears to make clean cuts. Dull blades can crush the plant tissue, leading to slower healing and potential disease entry points. Sterilizing your cutting tool with rubbing alcohol before each use helps prevent the spread of pathogens between plants.
The size of the cutting tool should match the thickness of the plant stem you intend to cut. For thin stems, fine scissors work well, while pruning shears are more suitable for thicker stems. Remember to make a swift, angled cut just below a node to promote successful rooting. By using the right cutting tool and technique, you set yourself up for a better chance of successful propagation and healthy new plant growth.
Preparing the Cutting
Select a healthy stem from your plant and prepare it for cutting to ensure optimal success in propagation. Begin by using clean, sharp scissors to make a clean cut. A jagged edge can hinder the cutting's ability to take in water and nutrients. Cut the stem at a 45-degree angle to maximize the surface area for rooting hormones to stimulate root growth. Ensure the cutting is between 4 to 6 inches long, as this length is ideal for encouraging root development.
Next, remove any flowers, buds, or fruit from the cutting. These parts can divert energy away from root formation. Ensure that the cutting has at least two sets of leaves at the top to continue photosynthesis and provide energy for root growth. If the cutting has large leaves, you can trim them in half to reduce moisture loss.
Removing Lower Leaves
Consider pruning the lower leaves of the cutting to promote root growth and focus energy on new root formation. Removing the lower leaves helps direct the plant's resources towards developing roots, which is crucial for successful propagation.

When cutting the lower leaves, ensure you leave at least a few leaves on the stem to allow the plant to continue photosynthesizing and producing energy. Trim the leaves using clean, sharp scissors to prevent damaging the cutting.
Applying Rooting Hormone (Optional)
For those looking to boost the rooting process, rooting hormone can be applied to the cutting before planting it in the growing medium. Rooting hormone is an optional but beneficial step in propagating houseplants from cuttings. This hormone aids in faster root development, increasing the chances of successful propagation.
To apply rooting hormone, dip the cut end of the stem into the hormone powder or gel. Make sure to shake off any excess hormone to prevent overapplication. The cutting is then ready to be planted into the growing medium.
Rooting hormones are available in different strengths, such as low, medium, and high. Choose the strength based on the plant species and cutting type for optimal results.
While rooting hormone can enhance the rooting process, it isn't always necessary. Some plants root easily without the use of rooting hormone. If you choose not to use rooting hormone, ensure other conditions like proper moisture levels and lighting are met to support successful propagation.
Planting the Cutting
When planting the cutting, ensure the soil is moist but not waterlogged to promote healthy root development. Choose a pot that's just big enough for the cutting with good drainage holes. Fill the pot with a well-draining potting mix, such as a mix of perlite, vermiculite, and peat moss.
Make a hole in the soil using a pencil or similar tool that's deep enough to accommodate the cutting. Remove the lower leaves from the cutting to expose the nodes where the roots will develop. Dip the end of the cutting in rooting hormone if desired, tapping off any excess.
Place the cutting into the prepared hole in the soil and gently pat the soil around it to hold it in place. Water the cutting lightly to settle the soil around it. Keep the soil consistently moist but not waterlogged, as excessive water can cause the cutting to rot.
Now that you have planted the cutting, it's time to provide adequate light and water for optimal growth and root development.
Providing Adequate Light and Water
After planting the cutting, ensuring it has enough light and water is vital for its growth and root development. Place the cutting in a well-lit area, but avoid direct sunlight as it can scorch the delicate new growth. Indirect light or filtered sunlight is ideal for most houseplants. Aim for at least 6-8 hours of light daily to promote photosynthesis and encourage strong, healthy growth.
When it comes to watering, keep the soil consistently moist but not waterlogged. Overwatering can lead to root rot, while underwatering can cause the cutting to dry out and wither. A good rule of thumb is to check the soil moisture with your finger; if the top inch feels dry, it's time to water. Use room temperature water and ensure that excess water can drain out of the pot to prevent waterlogging.
Monitoring Growth Progress
Keep a close eye on the cutting's development as it establishes roots and begins to grow. Check for signs of progress by gently tugging on the cutting after a few weeks to feel if there's resistance, indicating root growth. Additionally, observe the appearance of new leaves or growth points, which signal successful propagation.
Monitor the plant's growth by inspecting it regularly for any changes. Look for healthy green leaves, which indicate that the cutting is thriving. If the leaves start to wilt or turn yellow, adjust the watering or light conditions accordingly.
Measure the growth progress by comparing the cutting's size to when you first propagated it. Take note of any visible roots growing out of the drainage holes or emerging from the soil's surface. This growth indicates that the cutting is establishing a strong root system.
Transferring to a Larger Pot
Consider transferring your propagated houseplant to a larger pot to accommodate its growing root system. As your plant continues to thrive and develop, it will eventually outgrow its current container. This transfer is crucial to ensure that the roots have enough space to spread and absorb nutrients efficiently.
When choosing a new pot, opt for one that's 1-2 inches larger in diameter than the current pot. Make sure it has drainage holes to prevent waterlogging, which can lead to root rot. Before transferring, gently loosen the roots from the existing pot to encourage outward growth in the new container.
Fill the bottom of the new pot with fresh potting mix, then place your plant in the center at the same depth as before. Fill in the gaps with more soil and gently pat it down to provide support. Water your plant thoroughly after transferring to help it settle into its new home.
Enjoying Your New Plant
Are you ready to bask in the joy of nurturing and watching your new plant thrive in its environment? Now that you've successfully propagated a new plant from a cutting, it's time to enjoy the fruits of your labor.
Remember to place your plant in an area that receives the right amount of sunlight based on its specific needs. Regularly water your plant, but be cautious not to overwater as this can lead to root rot. Keep an eye out for any signs of pests or diseases, and address them promptly to ensure your plant remains healthy.
As your plant continues to grow, consider fertilizing it occasionally to provide it with the necessary nutrients for optimal development. Prune any dead or yellowing leaves to encourage new growth and maintain the plant's appearance. Take pride in the fact that you played a significant role in bringing a new plant to life, and revel in the beauty it adds to your indoor space.
Enjoy the process of caring for your plant and witnessing it flourish under your attentive eye.
Frequently Asked Questions
Can I Propagate Houseplants From Cuttings All Year Round, or Are There Specific Seasons That Are Better for Propagation?
You can propagate houseplants from cuttings all year round.
While certain seasons might offer more favorable conditions for successful propagation due to factors like temperature and humidity, many houseplants can be propagated at any time with the right care.
Just ensure you provide the appropriate environment and follow the correct steps to give your cuttings the best chance of rooting and growing into healthy new plants.
How Long Does It Usually Take for a Cutting to Develop Roots and Start Growing Into a New Plant?
It typically takes a few weeks for a cutting to develop roots and begin growing into a new plant. The exact timing can vary depending on the type of plant you're propagating.
Make sure to provide proper care by keeping the cutting in a warm and humid environment, and be patient as the roots establish themselves.
With consistent care, you'll soon see your cutting transform into a thriving new plant.
Are There Specific Types of Houseplants That Are Easier or Harder to Propagate From Cuttings?
Some houseplants are easier to propagate from cuttings than others. Factors like the plant species, growth rate, and rooting ability play a role.
For beginners, plants like pothos, spider plants, and snake plants are usually easier to propagate due to their resilience and simplicity.
On the other hand, some plants with more delicate root systems or slower growth may be harder to propagate successfully, requiring more attention and care.
What Are Some Common Mistakes That Beginners Make When Propagating Houseplants From Cuttings, and How Can They Be Avoided?
When propagating houseplants from cuttings, beginners often make mistakes by not using the right tools or not providing enough light and water.
To avoid this, ensure you have sharp, clean scissors for cutting, place your cuttings in a well-lit area but not in direct sunlight, and water them appropriately without overwatering.
Remember to monitor the humidity levels and be patient as your cuttings root and grow into new plants.
Is It Possible to Propagate a Houseplant From a Cutting That Has Already Started to Flower or Produce New Growth?
Yes, you can propagate a houseplant from a cutting that has started to flower or produce new growth. However, it's often recommended to wait until the flowering or new growth phase has passed to ensure successful propagation.
This way, the plant can focus its energy on establishing roots rather than sustaining blossoms or new leaves.
Patience is key when propagating from cuttings with existing growth.
Conclusion
Now that you have successfully propagated your houseplant from cuttings, you can sit back and enjoy watching it grow into a beautiful new plant.
Remember to continue providing it with the right amount of light, water, and care to ensure its healthy growth.
With a little patience and effort, you can expand your plant collection and share your green thumb skills with others.
Happy gardening!